
Strategies:-
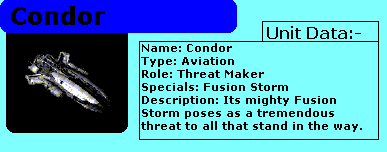
The Condor, a flying fortress of steel and iron, is an absolute threat to
anything that flies once its Fusion Storm is charged. Though the Fusion Storm
takes long to charge, leaving the Condor vulnerable to any air attacks, its
highly concentrated energy blast can pose as a certain risk, but this risk also
takes quite a long time to refire. Each Fusion Storm takes several minutes to
fully charge. And after charging, once fired upon, it releases a deadly
shockwave that blasts through even the toughest of Air Armor. Only very strong
Air Units can withstand the shock of a Fusion Storm.
Fusion Storm:-
The trick to Fusion Storm is not to waste all of it on one set of Air Units, but
split it up into various groups of Condors. By forming 3 groups of 2 Condors,
you can target 3 different sets of Air Units. But take note, if the Air Units
runs or forms the [O] formation, you could end up with damage only 1 Air Unit.
Should you miss or get out of range of your target, the Fusion Storm is wasted
and you need a few more minutes to recharge again.
Being Fusioned:-
Before you know it, you hear the bays of the Condor being opened and *PAAAA*
your Hawks fall to pieces. "Damn" You think, how to escape the Fusion?
Well, I'll tell you a little trick that MAY work. If you know that there are a
group of Condors that have been there for around 3-5 minutes, start moving in
the [Alt+Q] formation. Fly straight into the Condors (sounds nuts but it works)
and when you see the Condors deploying again, make sure that you are still in [Alt+Q]
formation and press [S]. Your AA will stop and fire at the Condors. The Condors
will probably get only 1 of your AA if you are fast enough. Remember, when
fighting with Condors, always make sure that the Condors are in the center and
you are on the outside.